
Upcycling : a denim skirt becomes a bag!
/Hello and happy May. I absolutely love this month - everything is fresh and new in the garden and apple blossom fills the vases in my home and the view from my kitchen window. Holiday plans are in the offing and making things for seaside travels seems like the best idea in the world. I have been quite busy, but wanted to share with you a project that has astonished me…..inspired by the Great British Sewing Bee and their transformation challenges, I decided to do one of my own.
There is no question at all that we are so wasteful in our everyday lives. Apparently in the UK last year, we threw away 300,000 tonnes of textiles which ended up in landfill sites. In the US more than 15 million tonnes of used textile waste was generated, a figure which has doubled over the last 20 years. It’s scary and shocking and we need to do something about it. In general, I am not really a big clothes shopper - I am a jeans girl who likes cotton shirts and wool jumpers, so I hope my environmental footprint isn’t too bad in this respect - but we can always do more. I was definitely brought up by a ‘waste not want not’ Mum who lived through the war years and rationing and when I started this project I thought about her a lot - she would have enjoyed seeing this.
It starts with a denim skirt - I have probably had it over 10 years and it is a more than a bit dated. I haven’t worn it for a long time, but it found it’s way into the cupboard in my sewing room because of the embroidered band on it - I always planned to do something with it. It has been sitting there for about 4 years and last week, I was clearing and tidying my sewing stuff and I plonked it on the floor of my sewing room with a firm intention to get on with it.

Denim must be one of the best fabrics for up cycling/recycling - it is strong and hardy and is always in fashion and sometimes it seems the more worn it is, the more desirable it is. I decided to make a bag - a fun holiday bag. I teamed it with a remand of gingham curtain material and found some leather bag handles on Etsy and was ready to go.

For some reason, it was harder to make that first cut than I would have imagined….I felt like I was spoiling something, but the fact is that once you’ve made that first snip, there is no going back.

What I realised almost immediately was that working with a bias cut garment might not be all that easy. Cut on the cross - with a lycra content meant it was stretching everywhere. So once the embroidered band was off, the rest needed some thought. I wanted to use the pockets too, so I cut around them and then cut the largest pieces I could out of what was left.
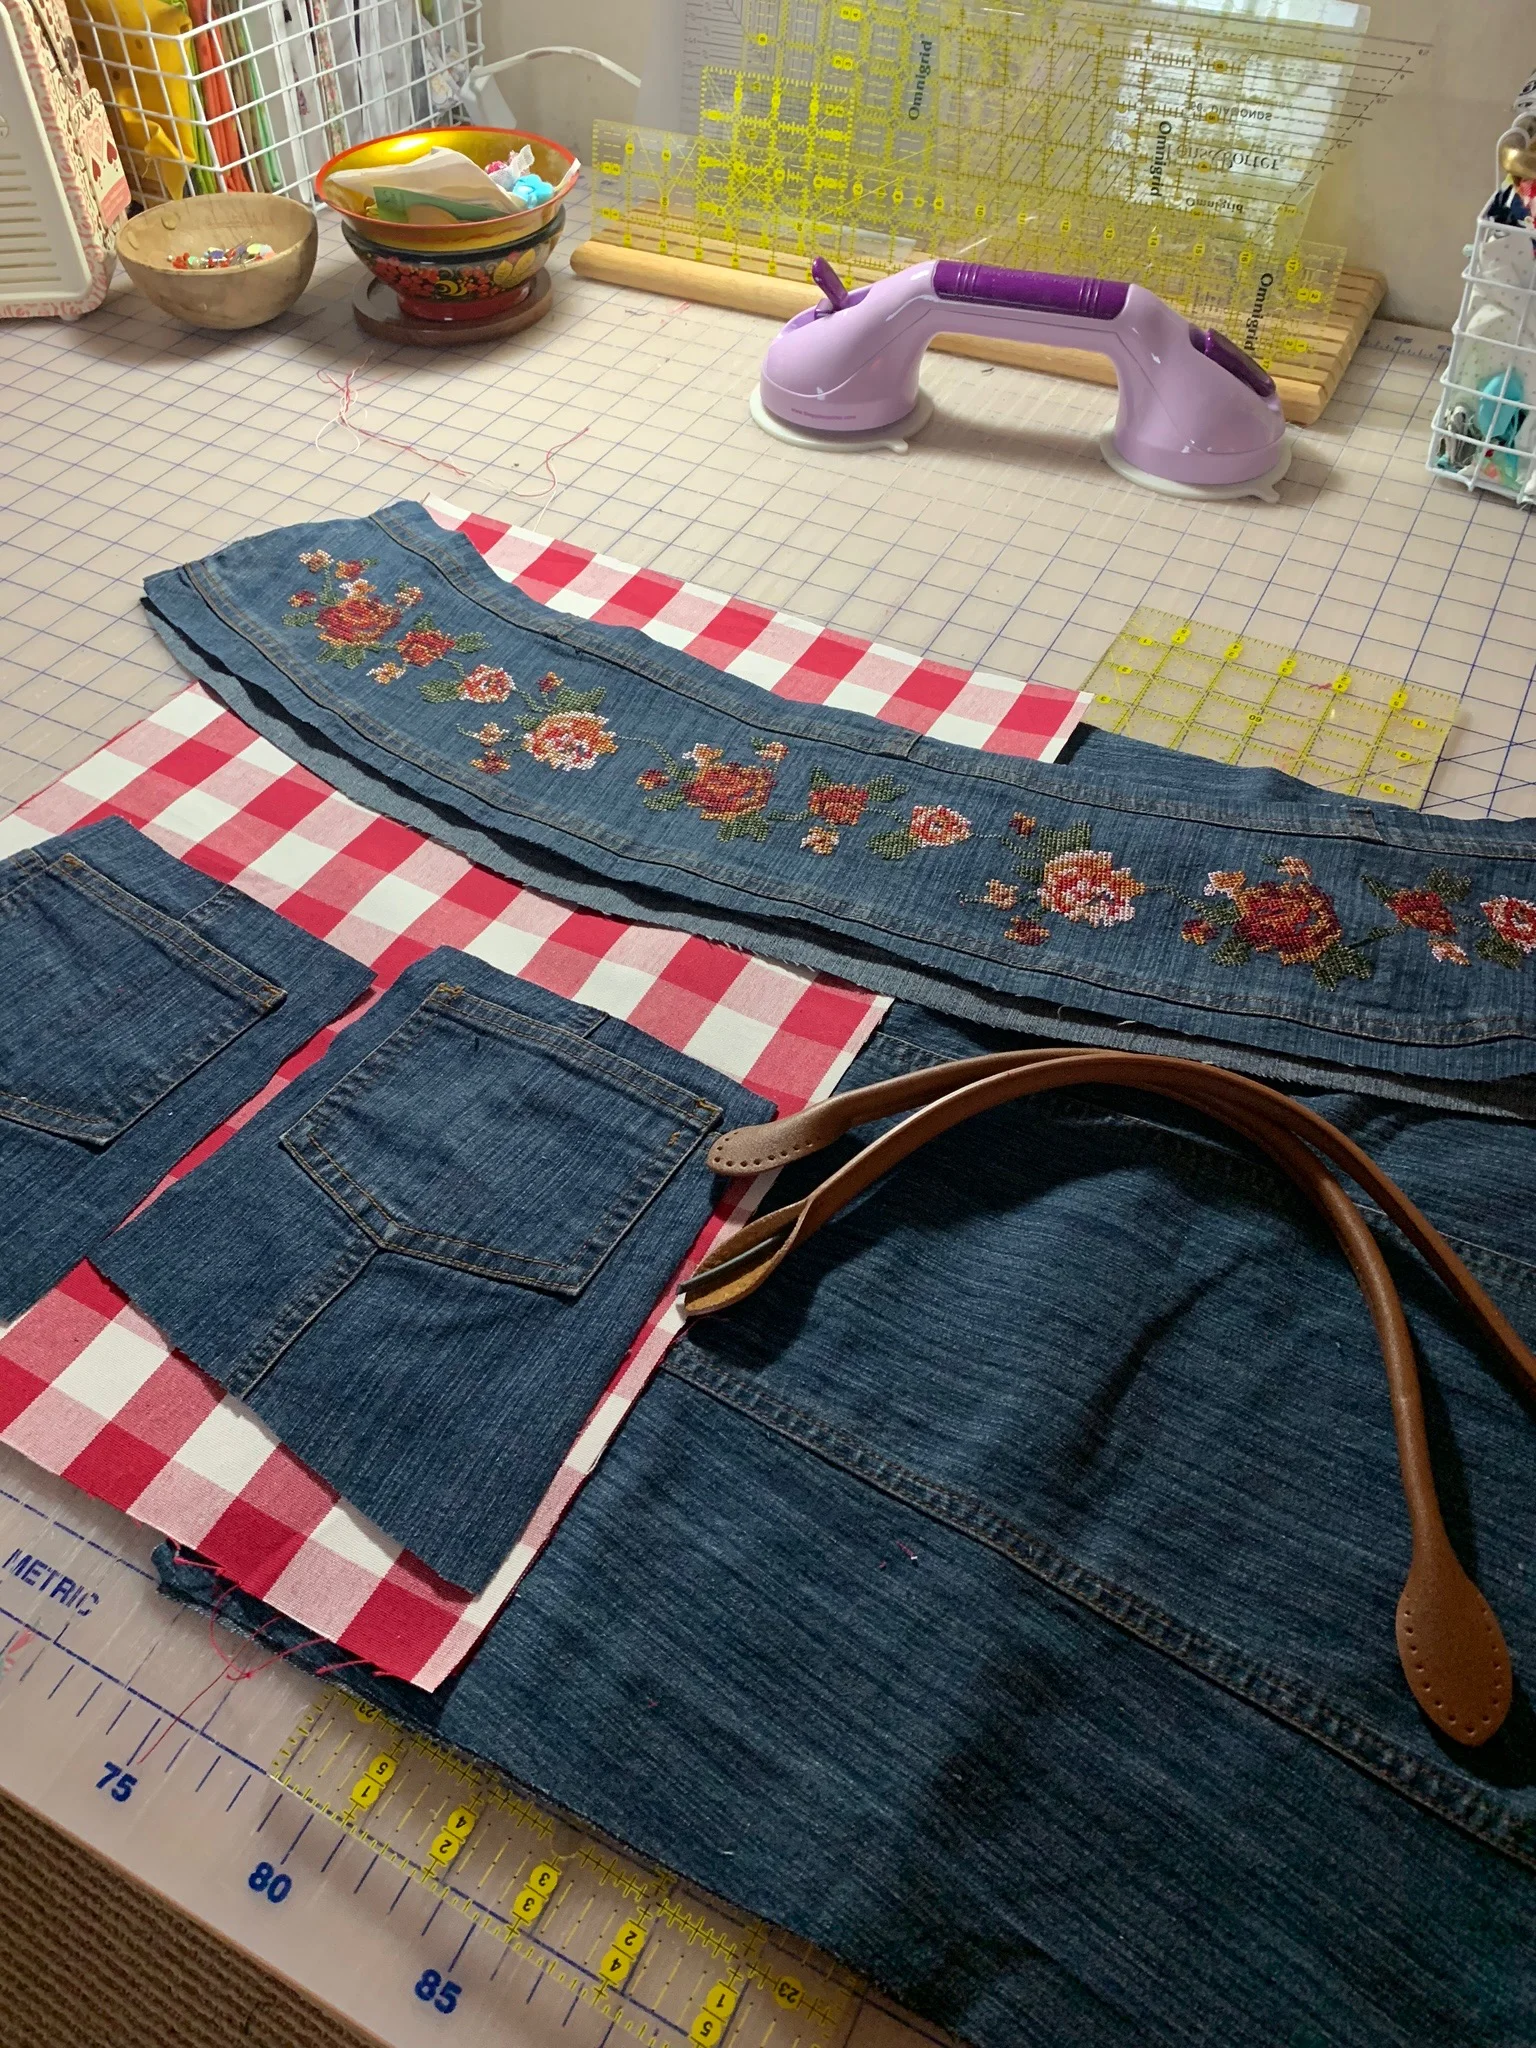
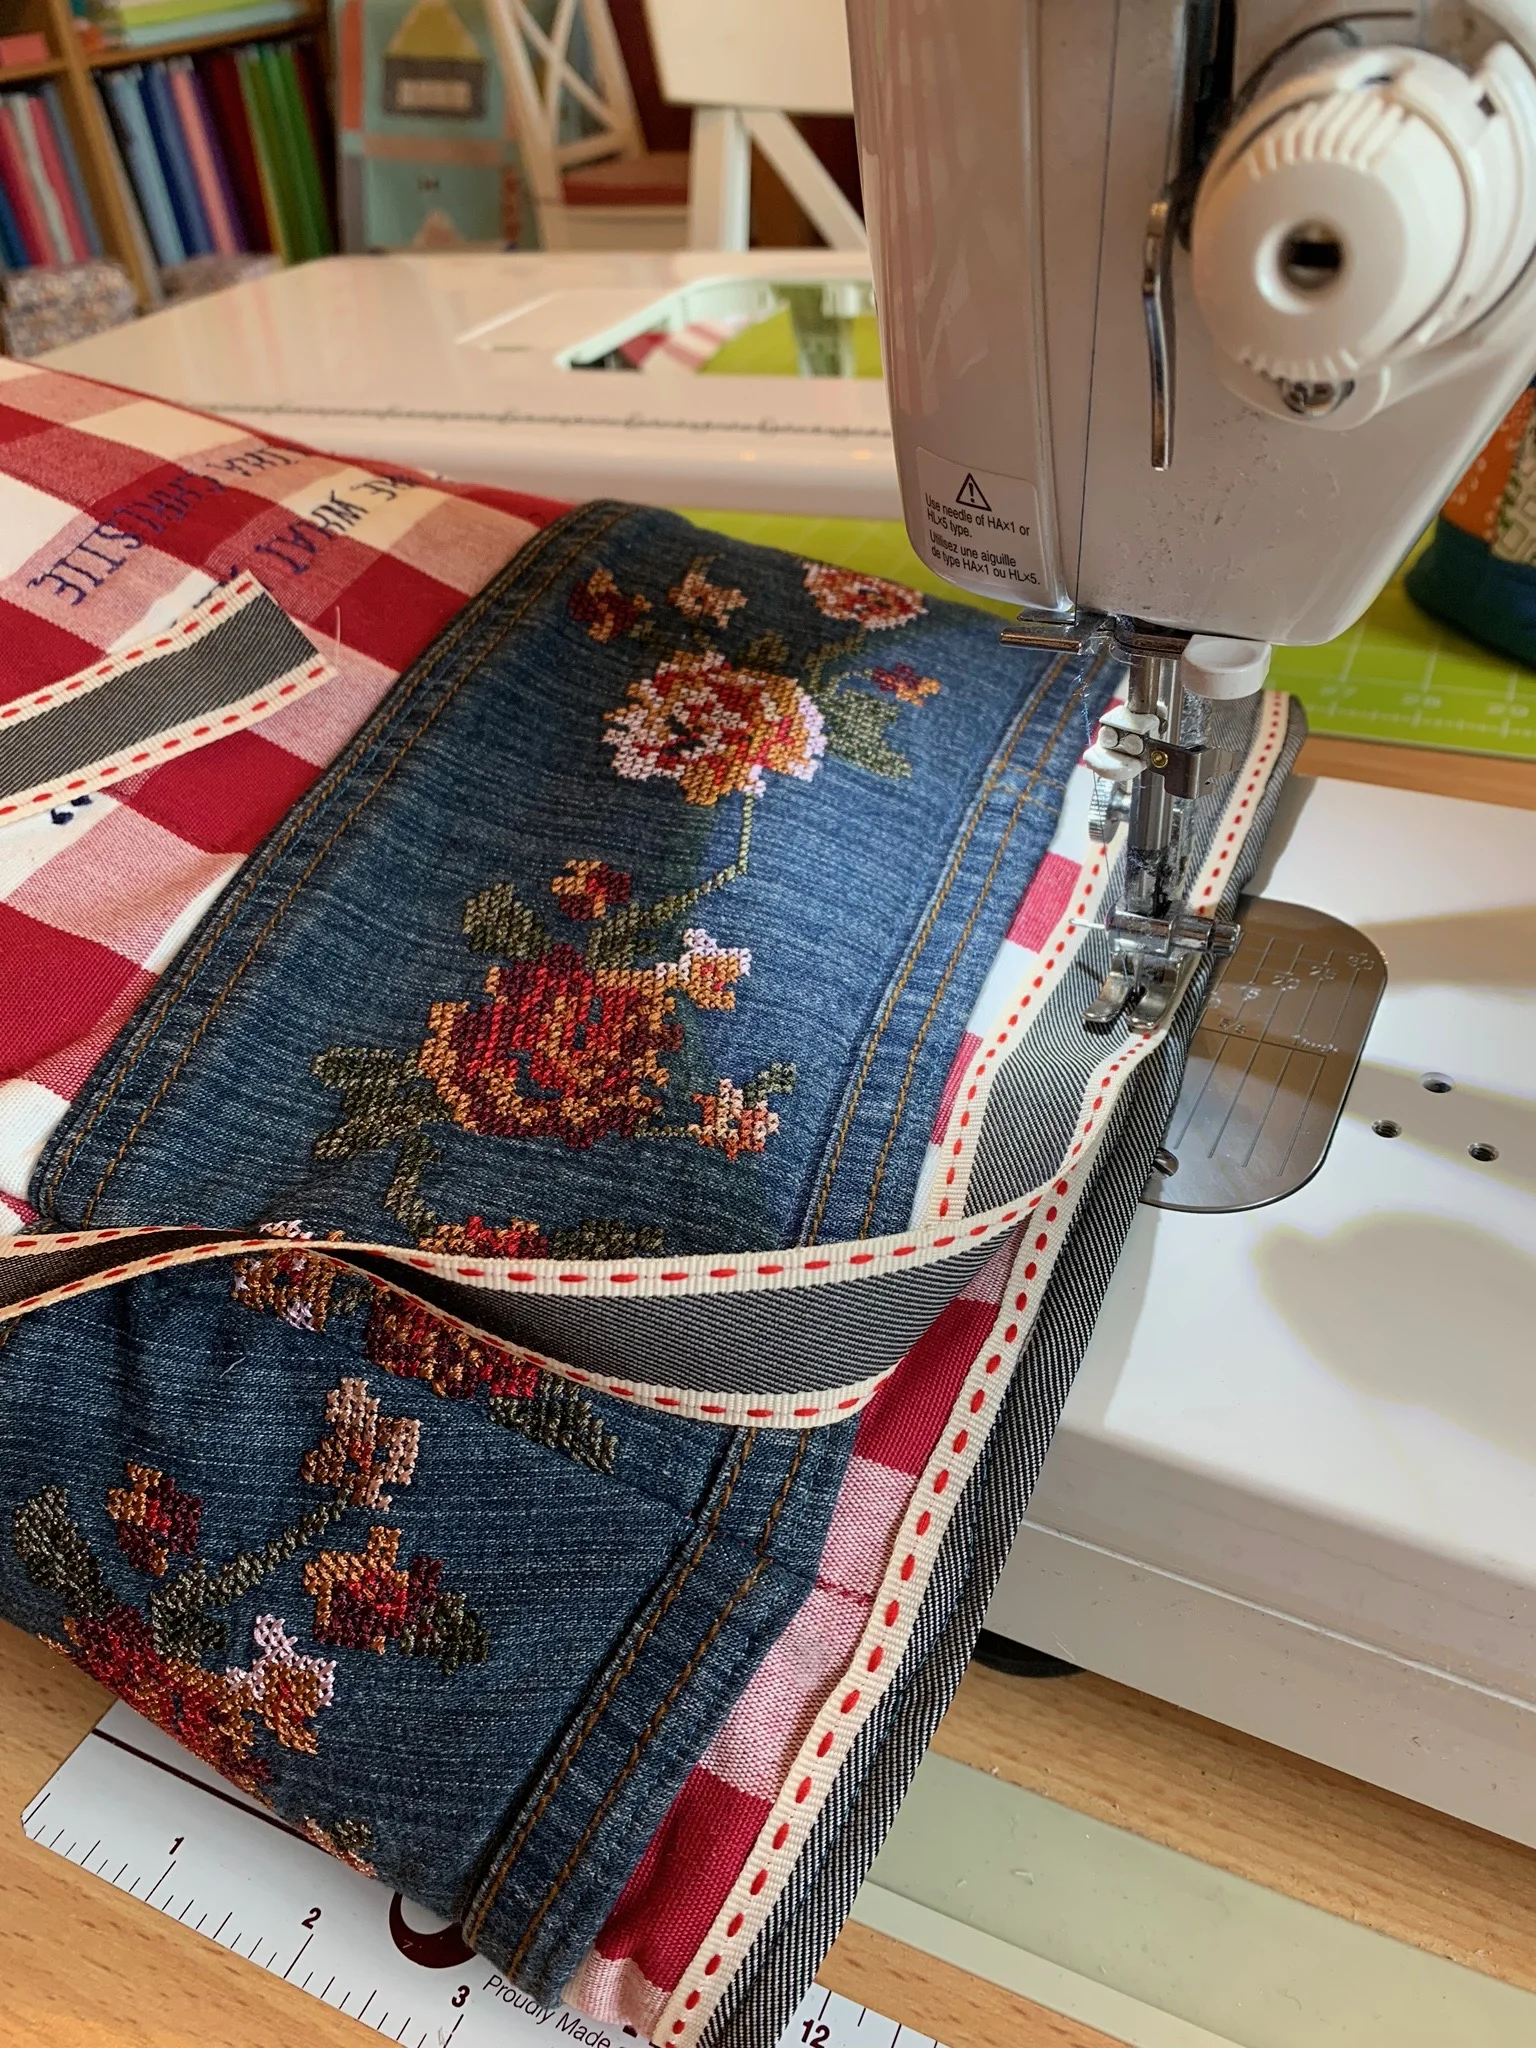
It fell quite easily into a bag design - two bands of embroidery on a gingham base and denim lining and a pocket on one side and one lining side. It was apparent though that because of the stretchiness, the first thing was to stabilise the denim with woven iron on interfacing. I used this on the gingham as well and then having cut my panels, attached the embroidered band on the front and back of the bag.
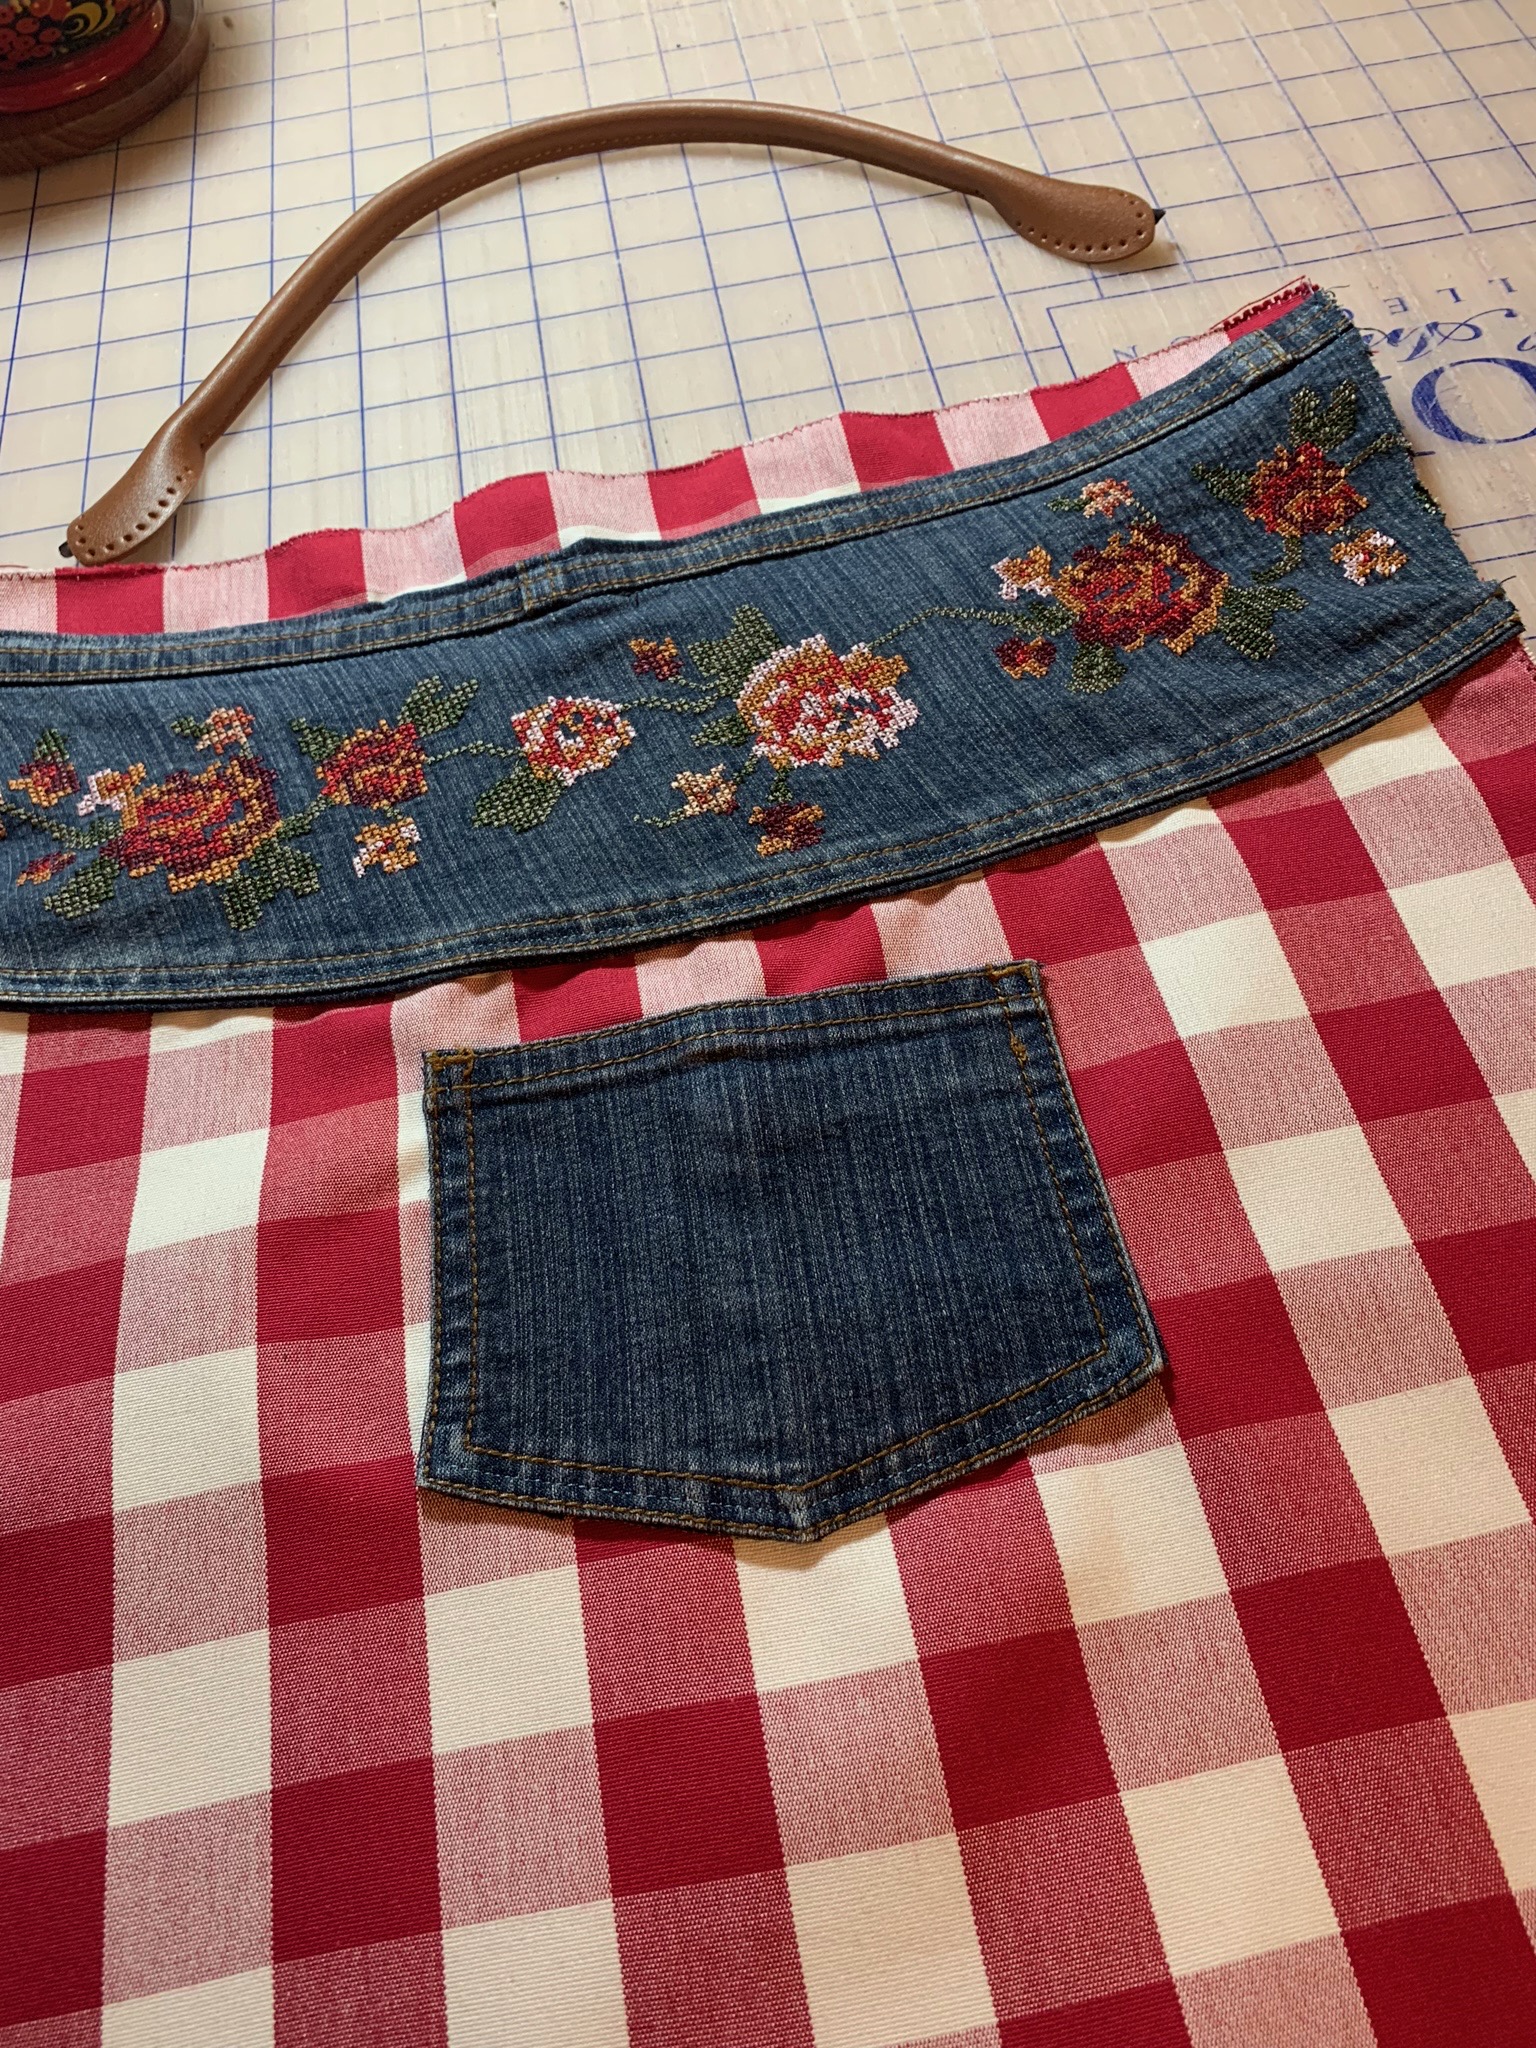
It was remarkably straight forward and I thought it looked so pretty I was amazed. I have made a few bags now and every time I learn new things and try new things and this time, I used some brass rivets on the bag pockets for decoration - they seemed to go with the denim look and added a bit of interest. The key here is to have a punch - it makes it so easy to fit rivets and they do look cool. It always causes great amusement in our house when this hole punch makes an appearance. A few years back, my husband and daughter were christmas shopping and when my husband picked this punch as a stocking filler for me, my daughter was unimpressed to say the least. She can never quite get over the fact that it was a winner and her dad won’t let her for sure! In fact it is extremely useful and as they say….tools of the trade make light work of things and this is a great piece of kit to have in your sewing room.


I also decided to add a bit of text on the other bag panel. Agatha Christie had the perfect words for something that is very definitely not what it seems. Using the monogramming program on my Janome Horizon and some teeny tiny buttons, it just added a little twist to the bag.
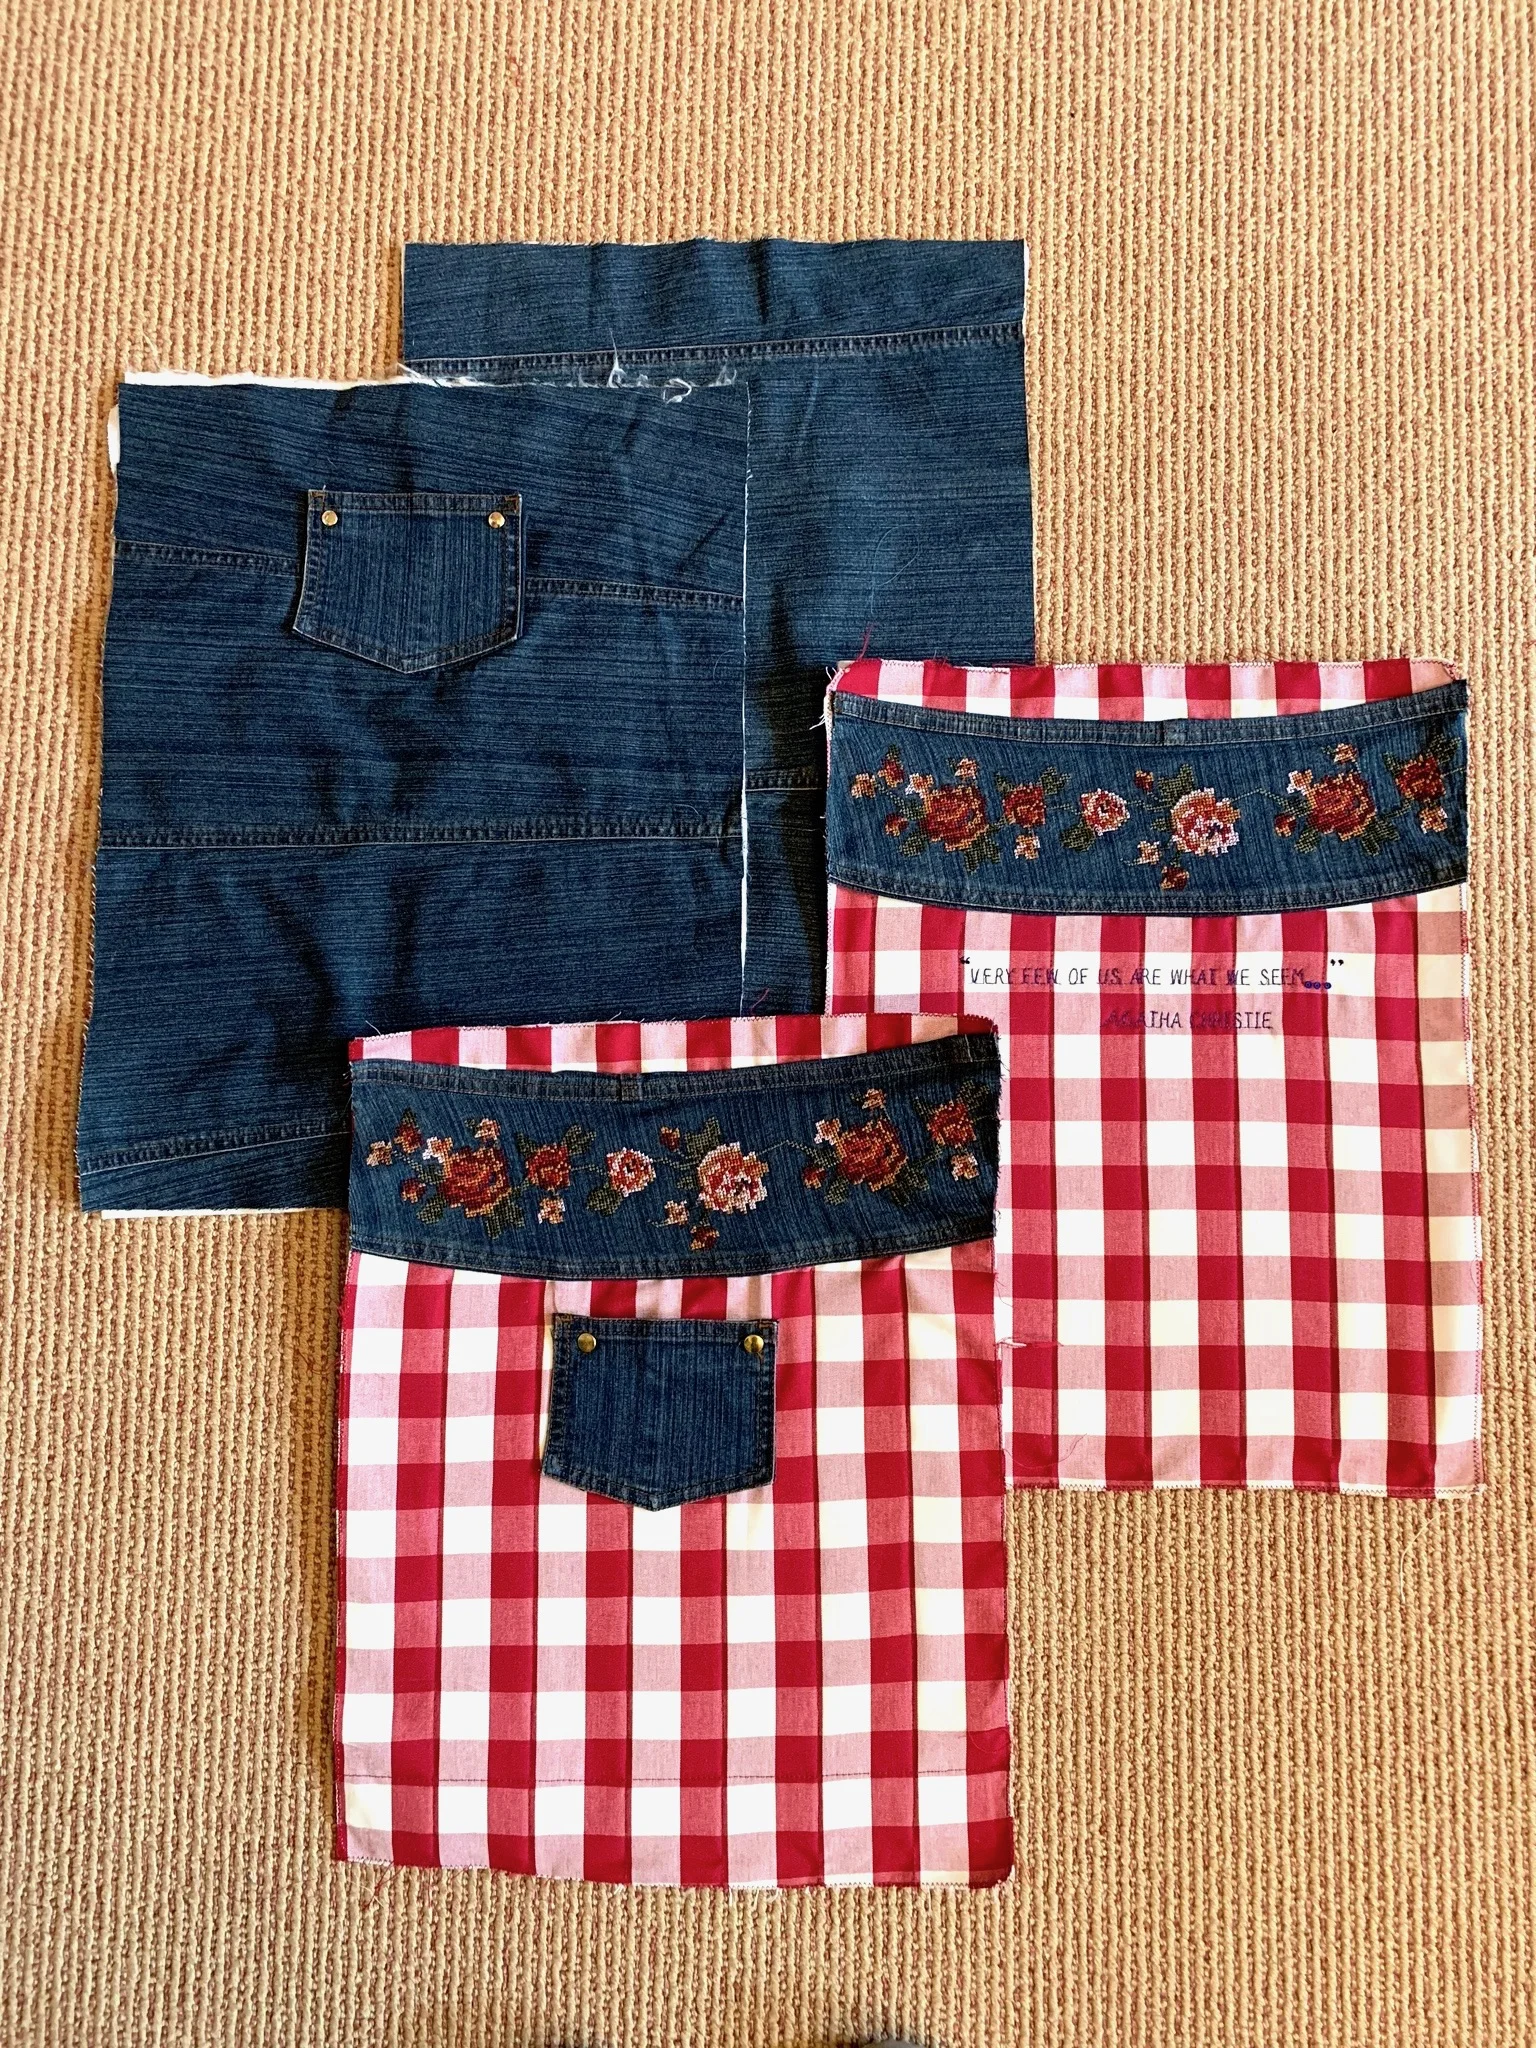
I thought at this point that I was pretty much ready to assemble my bag. I added very firm bag batting to the gingham pieces and stitched some lines of machine stitching down the gingham stripes to secure it. Once I had constructed the outer bag I put some bag feet studs on for a professional finish.

For the denim, I used ordinary quilting wadding to give a more padded effect. I stitched a couple of horizontal lines across the denim to keep this in place. Once I had put the outside of the bag together though, I realised that I was going to need to properly quilt the lining to give it more body.

Finally ready to put it all together and having place the lining bag inside the outer bag, I used some denim ribbon to seal the top edge and then another piece of ribbon around the outside edge to make it tidy and because it looked rather sweet.
Adding the leather handles on was super easy - matching thread was supplied with them and as I was sewing them on I thought not only how lovely they were, but how when this bag is worn out - I can unpick them and use them for another project.

I love this bag….it is going to be much used and so fun for holidays… good job we are off to the Isle of Wight soon…..


P.S. Useful links : rivets, bag feet and metal ‘handmade’ bag tag are by ‘Emmaline Bags’ from Sewhot.co.uk
Bag batting is ‘Matilda’s own bag wadding’ from Doughty Bros.
Leather handles from amazon.co.uk